Magnets
Magnets can enhance your Coinfinity stacking system by adding secure, magnetic alignment to bases, stackers, and caps—making your storage more satisfying, stable, and modular.
These magnets cost around $0.13 each, making them an affordable and fun upgrade.
⚠️ Note: Magnets are completely optional!
If you skip them, your slicer will simply fill the magnet wells with solid print material.
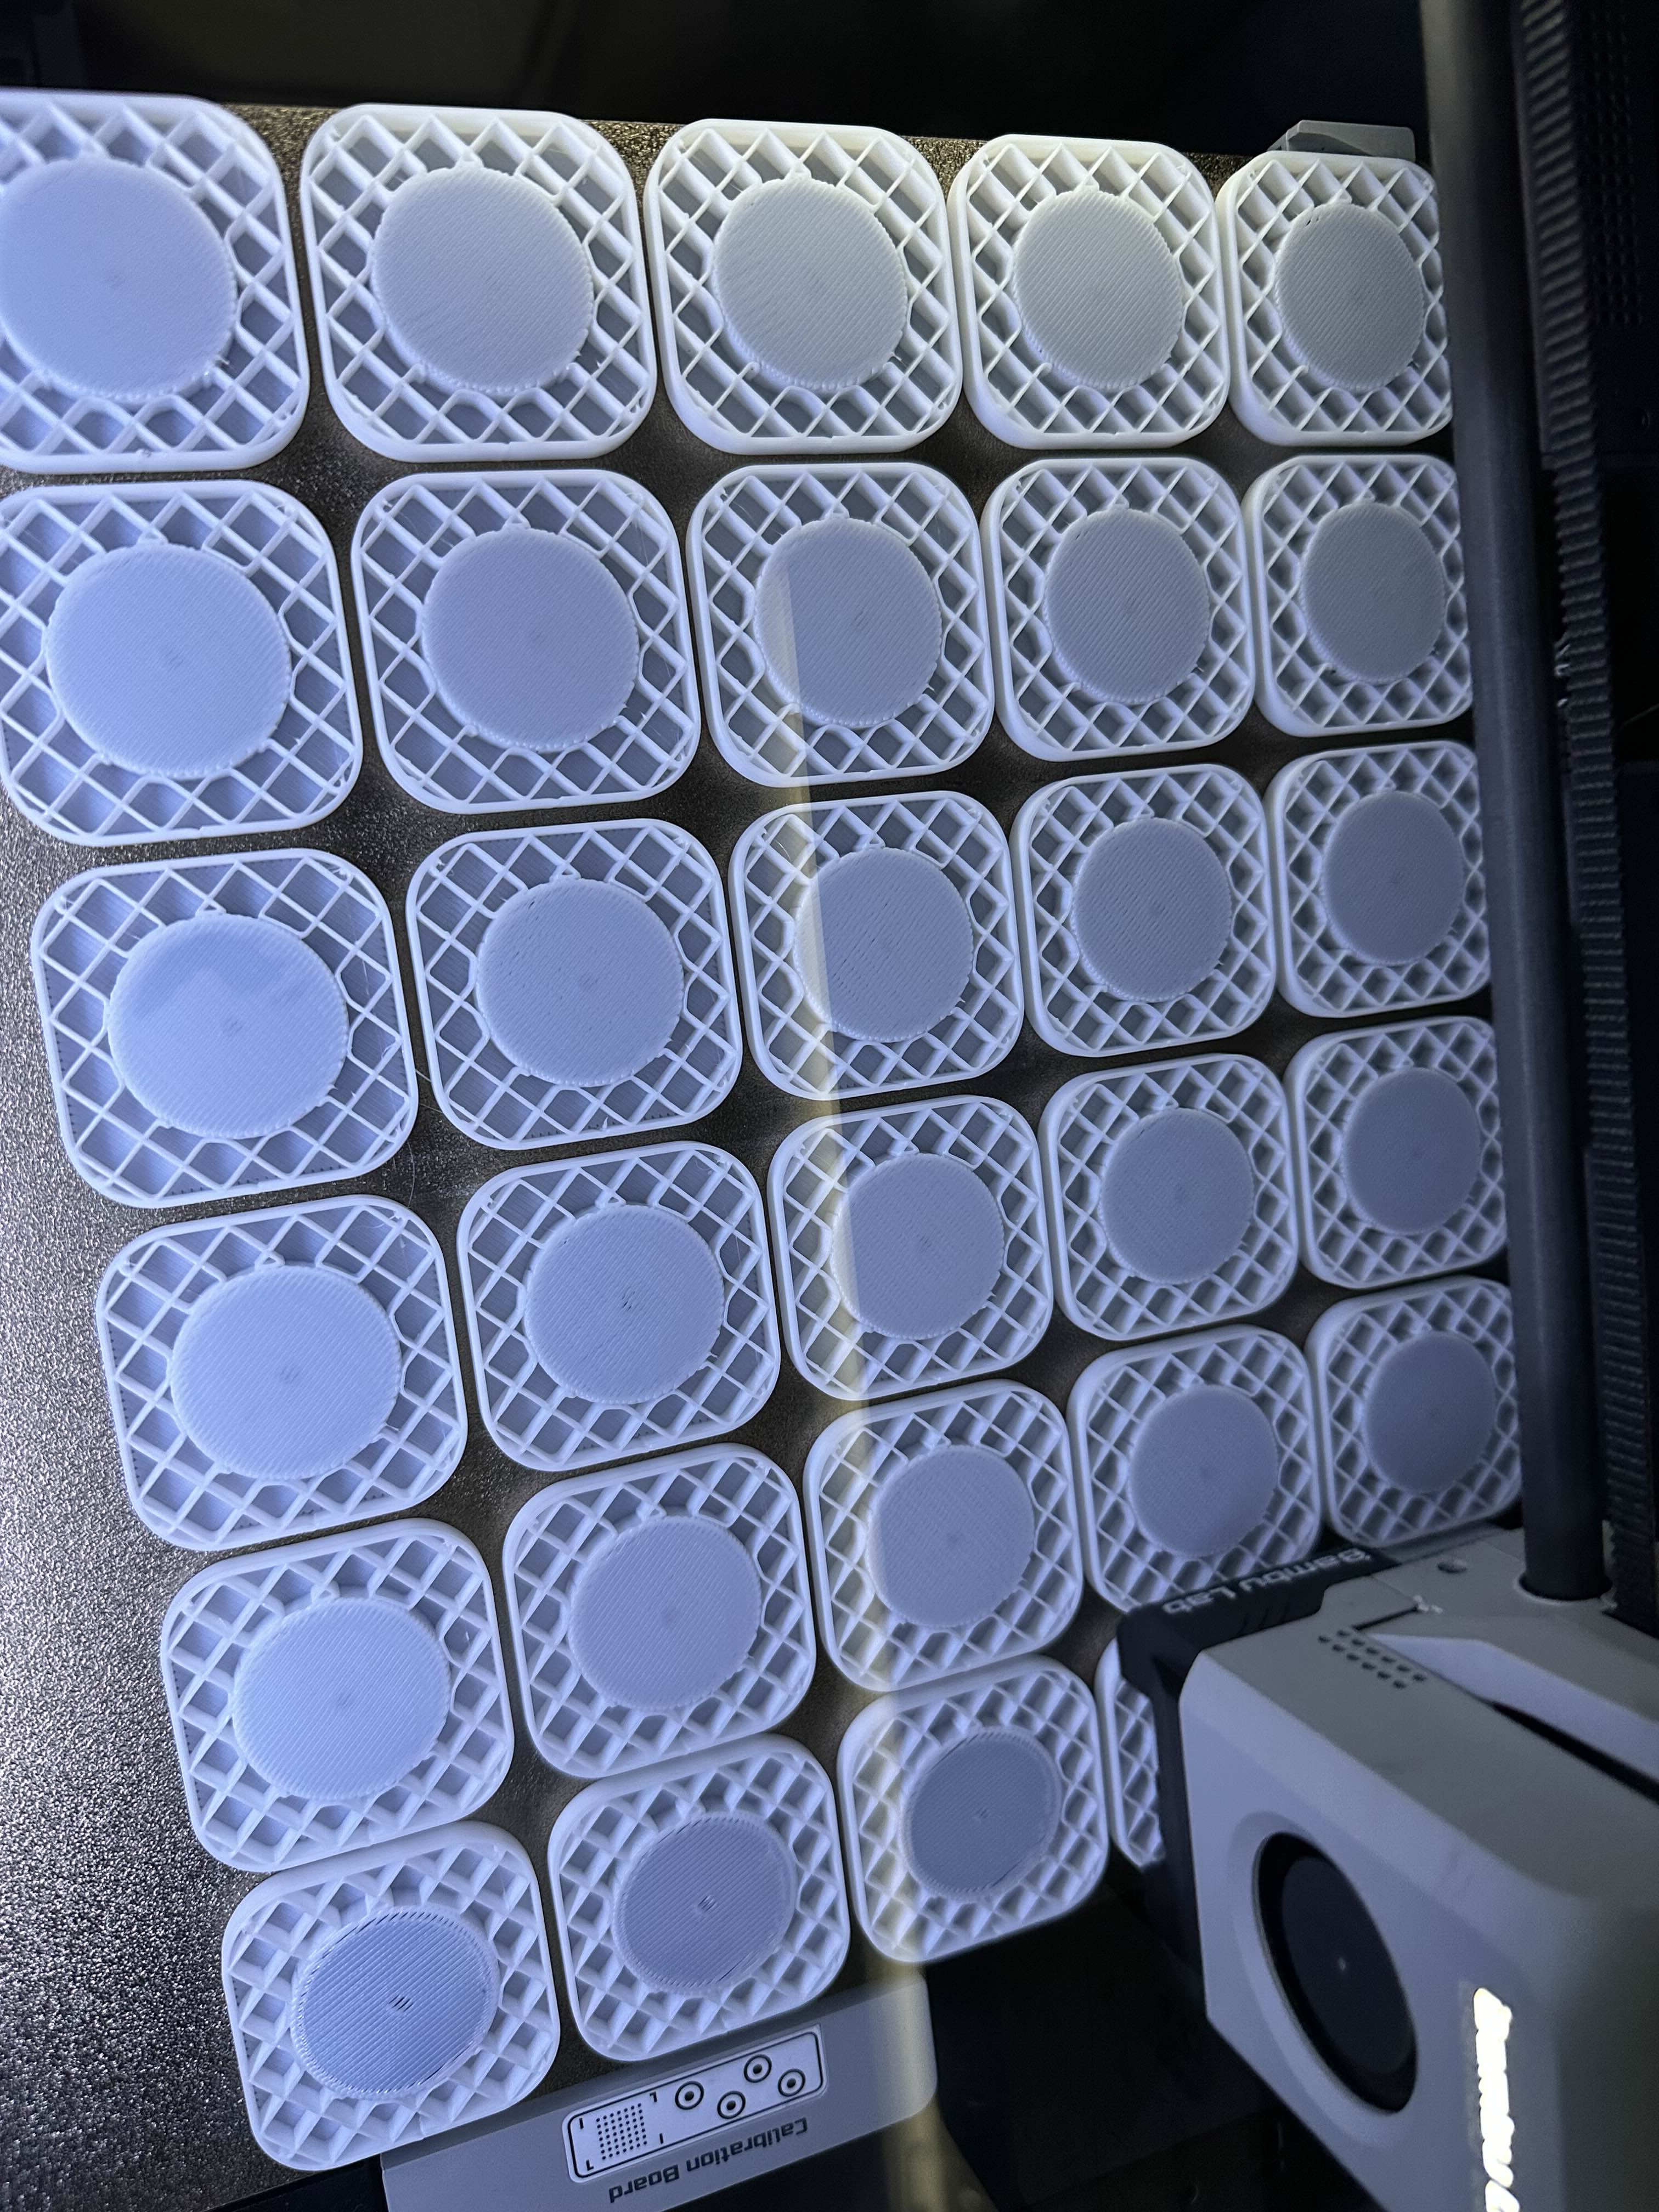
Magnets can be embedded into the body of the stacker cap and tube during printing. 
Why Add Magnets?
✅ Pros
- Makes stackers snap together with alignment and a satisfying click
- Adds stability to tall stacks or top-heavy tubes
- Allows accessories like magnetized caps or trays
- Feels more polished and premium
- Everything stays together and stacked!
You can make your stack higher! It’s addictive! 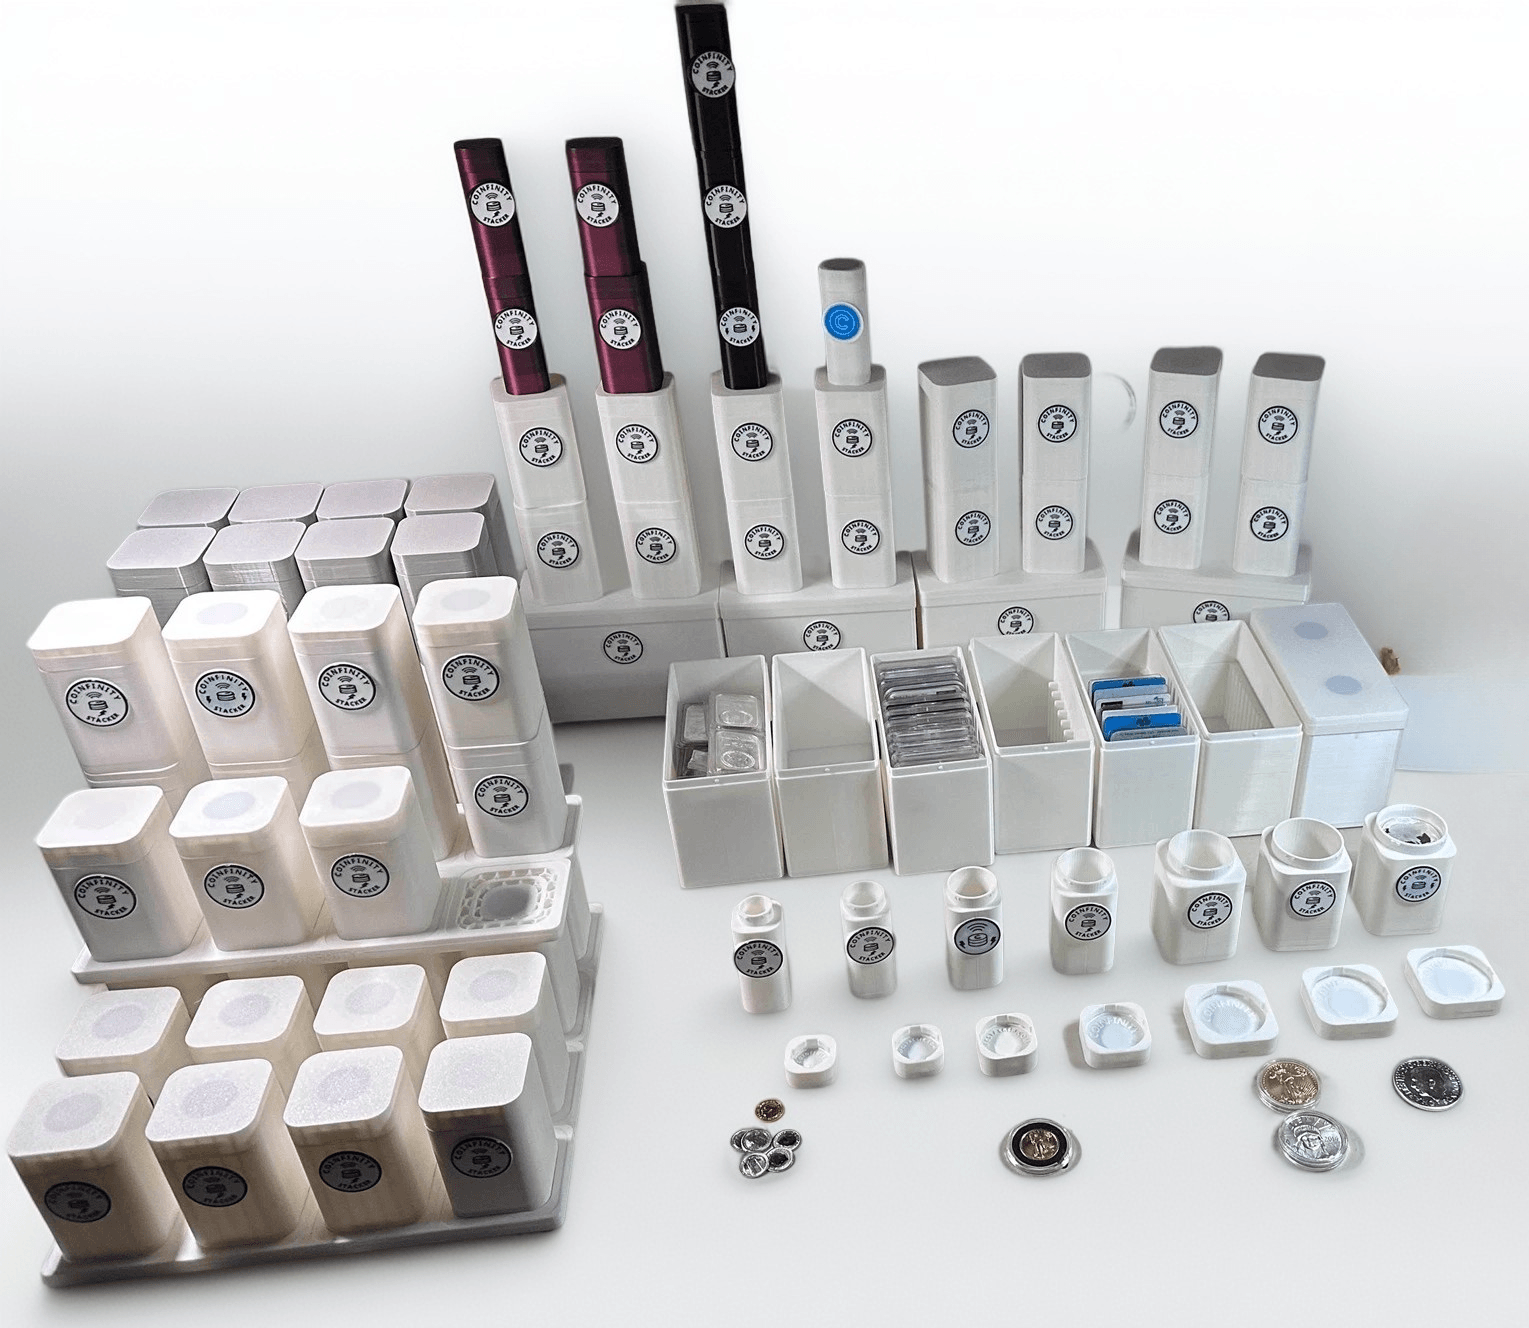
❌ Cons
- Magnets can be dangerous if swallowed—keep away from children and pets
- Adds complexity to printing (requires inserting during the print or pausing to place)
- Can accidentally affect magnetic strips or sensitive electronics if placed nearby
Magnets are embedded inside each stacker tube and cap.
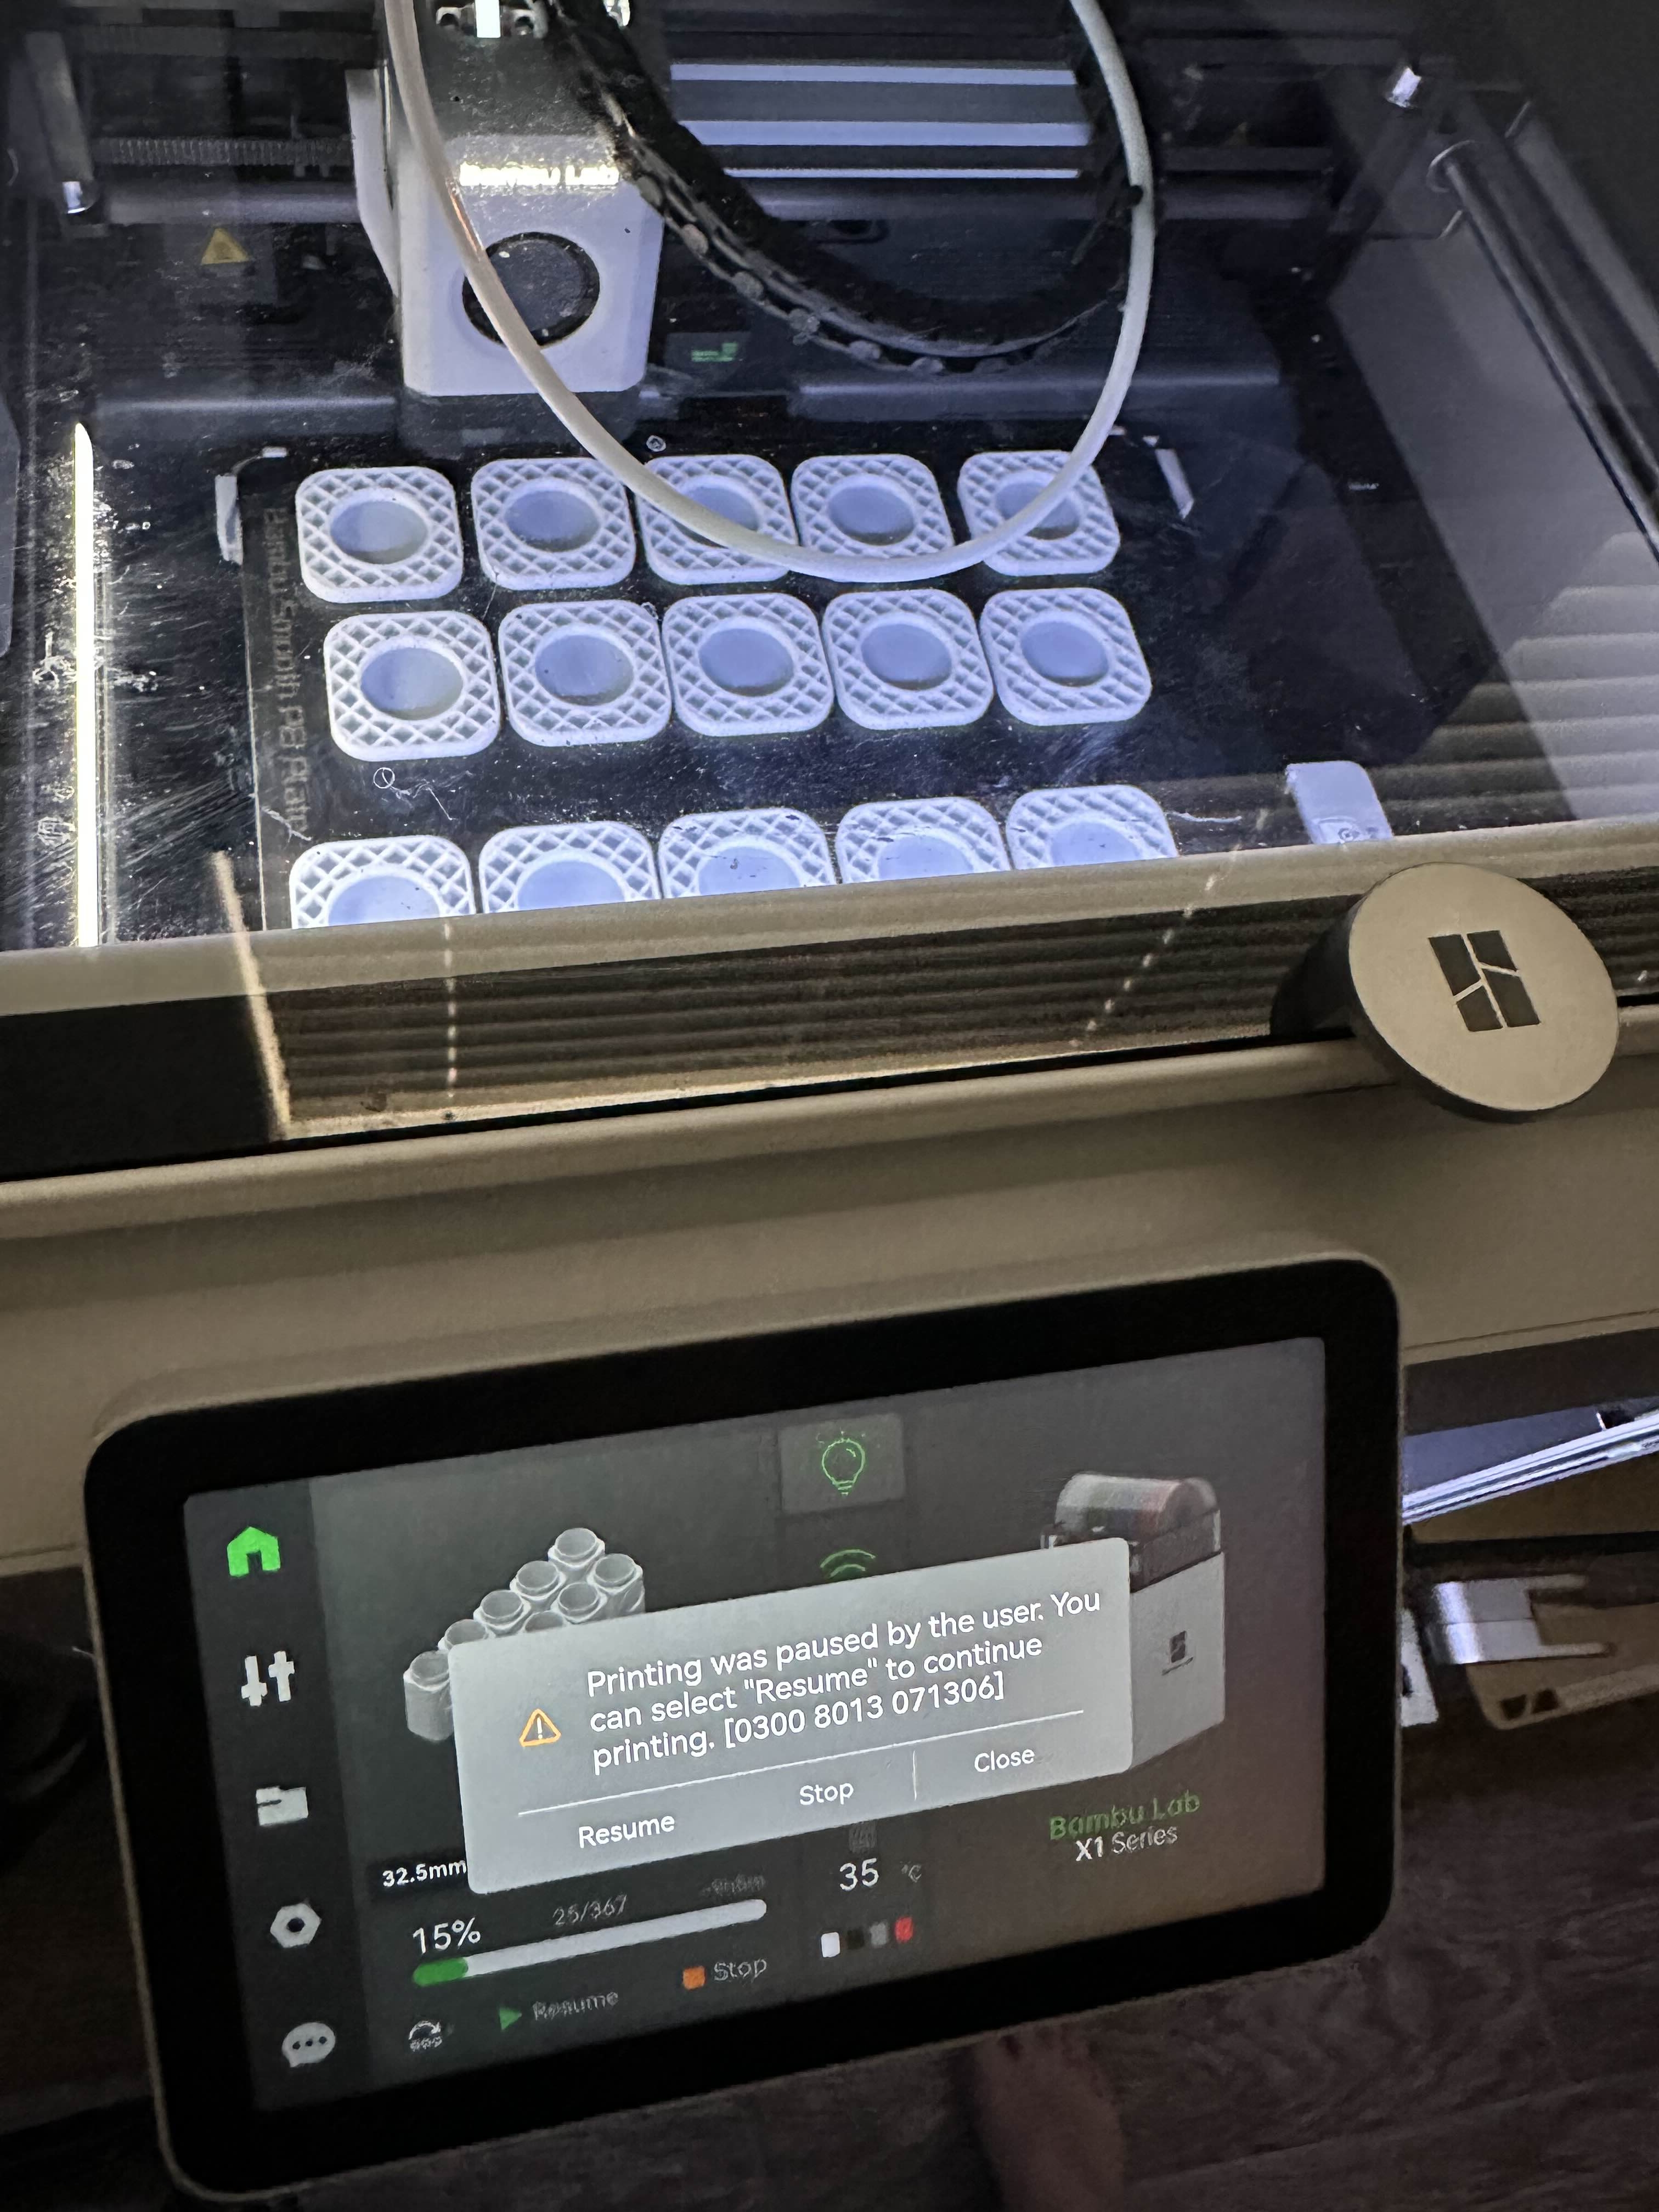
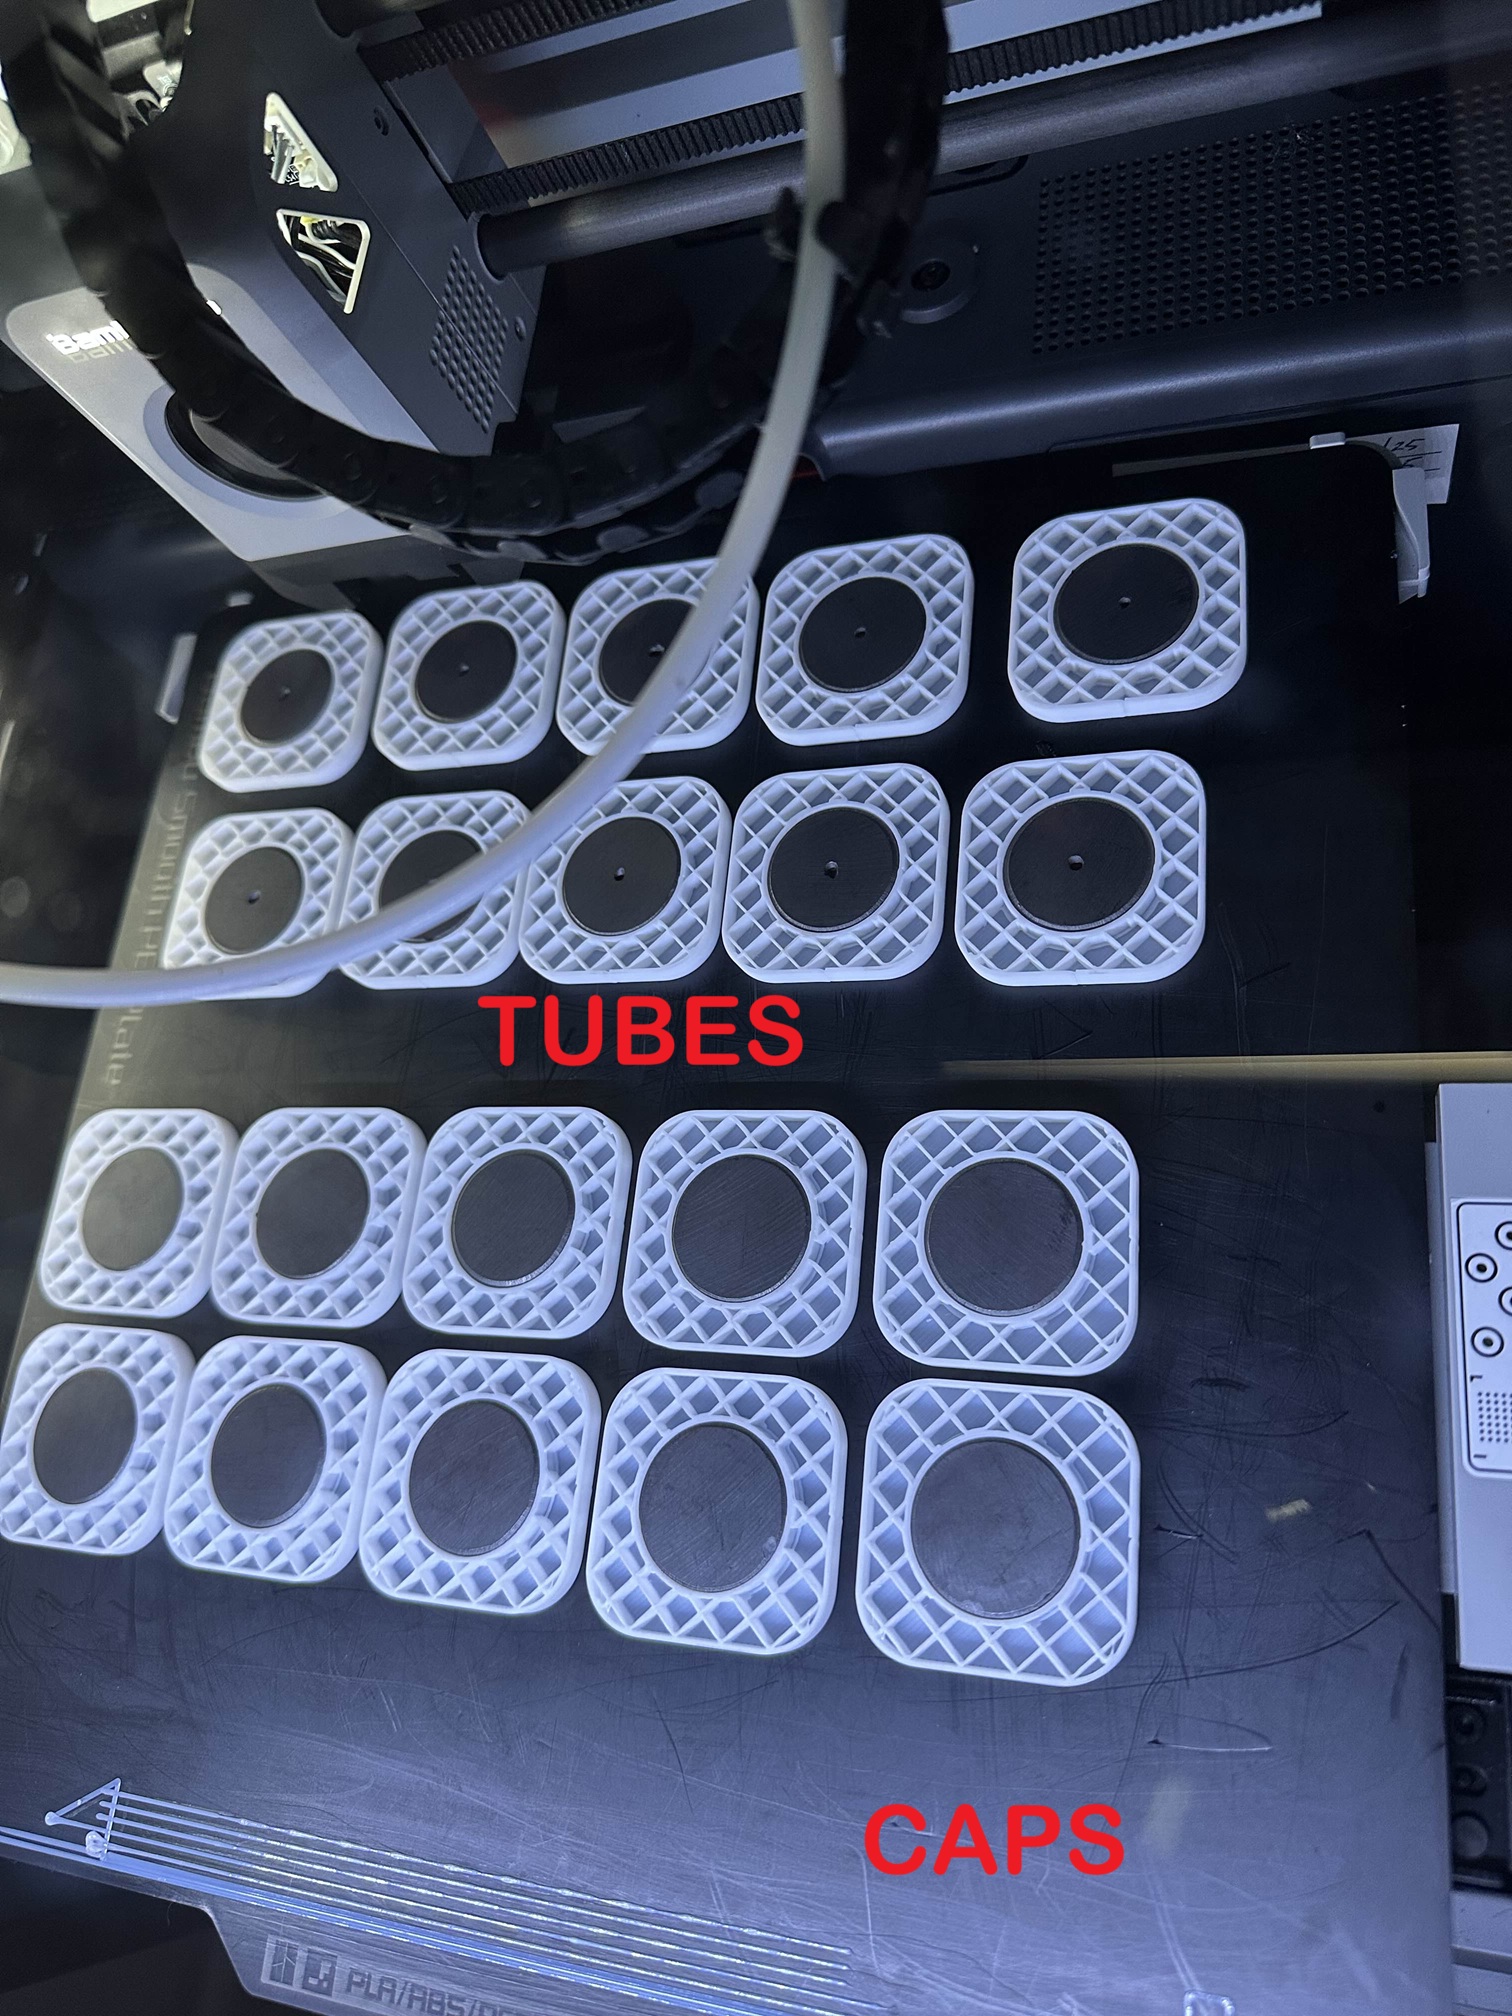
Add a Pause to the layer that covers up the magnet wells. The printer will pause at the layer where the magnets are inserted. Resume the print once magnets are inserted.
👍 Tip: SET A TIMER!! If done quickly and cleanly, you shouldn’t see any layer lines at the pause layer. The longer the part has to cool, the higher the odds of a layer line forming. Especially with Silk style filaments.
Safety Guidelines
- Keep magnets away from electronics, magnetic storage media (e.g. credit cards), and pacemakers
- Store securely — magnets can attract and snap together forcefully, which can pinch skin
- Never ingest — magnets can be extremely dangerous if swallowed
Magnet Specifications
We recommend using 1” ceramic (ferrite) magnets — these are safe, inexpensive, and easy to install. The magnets we recommend have a “dimple” on one side to denote N/S polarity.
- Type: Grade 5 Ceramic / Ferrite Magnet (NOT neodymium)
- Size: 1” (25mm) diameter × 4mm thick
- Strength: ~2800 Gauss
- Cost: ~$0.13 per magnet
- Source: Amazon – 50 or 120 Pack
🧲 Do not use neodymium magnets—they’re stronger, but more dangerous and not needed for Coinfinity!
How to Insert Magnets
Use your slicer’s “pause at layer” feature (often called Magnet Pause) to automatically pause the printer when it completes the magnet cavity and is ready to cover it up.
- Preview layers until you see the cavity just begin to close over
- Add a pause just before that point, at that layer
- Insert the magnet(s)
- Resume the print
Make sure the magnet is flat and flush. You don’t want it to stick up into the next layer. Don’t push so hard that the build plate shifts. If you do, you might end up with a layer line on the outside of your print.
Polarity Matters!
We recommend:
- south pole (flat side) facing down for the lids and caps
- north pole (dimple side) facing up for the tubes and bases.
🧭 Tip: Just imagine in your head the upright position of each item that you print. Always orient the magnet with the dimple facing up for correct polarity.
If you mix up polarity, your stackers may repel each other.
Printing Tips
- Use a pause-at-layer feature for reliable magnet embedding.
- Watch the first layer after inserting magnets to ensure they don’t shift
TL;DR
- ✅ Use 1” × 4mm ceramic magnets (~$0.13 each)
- ✅ Insert during print with pause
- ✅ south side down, north side up for lids and caps
- ✅ north side down, south side up for tubes and bases
- ⚠️ Keep away from NFC tags and electronics
- ❌ Neodymium not recommended
Next: DIY Bill of Materials
If you have trouble you can reach out to the COINFINITY Discord server for assistance.